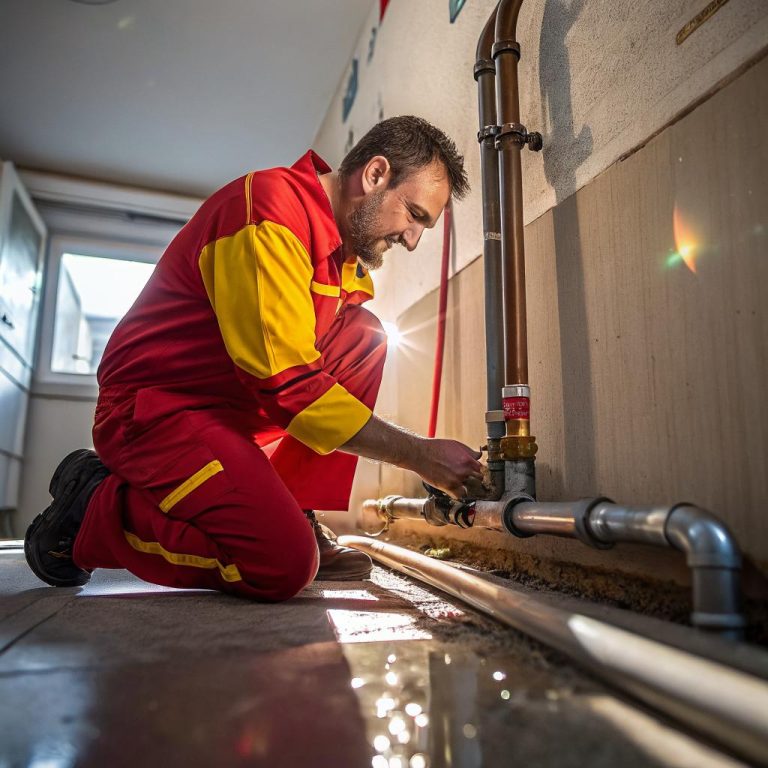
The first time you pour clear epoxy over a textured surface, it feels a bit like turning a sketch into a glassy puddle of reality. Light bends, shadows deepen, and suddenly the floor, prop, or wall starts to look less like construction and more like a world someone can step into. That is the whole point for set designers, especially in immersive work: you are building a world, not a backdrop. In Denver, that often means working with altitude, dry air, and quick turnarounds, which is where materials like epoxy resin Denver come in, because they give you control over surface, shine, and durability without needing a massive art department budget.
In short, if you are building an immersive set in Denver and you want floors that look like wet cobblestone, glowing sci fi labs, deep water, or stained glass, epoxy is one of your best tools. It bonds to concrete, wood, and many props, survives foot traffic from audiences, and can be tinted, layered, and textured in ways that cameras love. The catch is that Denver’s altitude and climate speed things up, so you have less time to fix mistakes. Get the right product, prep well, test your colors, control temperature and humidity, and you can create surfaces that feel dangerous, magical, or strangely calm, without spending weeks redoing paint that keeps scuffing off.
How epoxy fits into immersive set design
Most people think of epoxy as something for garages, not for theater or experimental art. I used to think that too, until I watched a “basement portal” scene come alive once the floor was poured. The plywood and foam looked fine before, but after the epoxy, it felt like the floor had depth.
So what does epoxy actually do for an immersive set?
- It gives you a hard, continuous surface that looks finished on camera and to the audience.
- It lets you create illusions: water, lava, glass, ice, marble, oil spills, glowing cracks.
- It protects high traffic areas so your paint work does not vanish after the first weekend.
- It helps hide seams between platforms or patched concrete.
If you are used to flats and standard scenic paint, epoxy feels like a different tool altogether. It is more like a clear, self leveling skin that you tint or layer. That skin can be paper thin or several millimeters thick, which changes how light moves across it.
For immersive sets, epoxy is less about “finishing a floor” and more about adding a layer of story under the audience’s feet.
You can put printed graphics under it for a control room, embed small objects in it for “fossil” floors, or float pigment through it to suggest motion. All of that matters when you want people to feel like they are inside a place, not just looking at one.
Denver specific epoxy challenges that affect your sets
People outside Colorado sometimes forget that materials behave differently here. Epoxy is no exception. If you are planning a big pour for a warehouse show, a gallery, or a black box, you need to think like both an artist and a cautious shop supervisor.
Altitude, cure time, and heat
At Denver’s elevation, epoxy systems tend to cure a bit faster and get hotter during that curing. On a prop, this is annoying. On a 1,000 square foot floor, it can spoil the surface or even cause cracking or yellowing.
Key factors that matter:
- Temperature in the room and on the floor
- Humidity (Denver is usually dry, which can change cure behavior)
- Thickness of the pour
- Batch size in the mixing bucket
If you mix a large batch in a warm shop and wait too long, the resin can start to kick in the bucket before you even get it on the floor. That means stringy texture, uneven self leveling, or a surface that looks wavy and patchy.
Treat epoxy like it has a timer attached. In Denver, that timer can feel slightly shorter than what the technical sheet suggests.
I think some people underestimate this and assume they can “work fast enough” without adjusting their plan. That is usually the first mistake.
Ventilation in theaters and warehouses
Epoxy for floors and sets is usually low odor compared to old solvent products, but it is still not something you want on a closed stage with no airflow. Many immersive spaces are in basements or converted warehouses with odd ventilation. You need to think through:
- How air will move across the surface while it cures
- Where dust is coming from (loading dock, shop area, HVAC)
- Whether you can isolate that area from the rest of the space
Fans help with fumes, but they also blow dust straight into your fresh surface. So you have this constant tradeoff. On a live project, we ended up turning fans on only in bursts, then shutting them off for several hours while the surface set up, which was not ideal but better than hair, glitter, and foam dust locked into the finish.
Schedule pressure and audience traffic
Immersive runs in Denver often have tight bump in schedules. You get the venue late, rehearsals start soon, and there is a temptation to pour epoxy too close to an opening.
That is risky for two reasons:
- Full cure often takes several days, even if it is walkable after 24 hours.
- Heavy foot traffic before full cure can leave subtle imprints or scuffs inside the finish.
If your set requires heavy furniture, rolling carts, or platforms, you want as much cure time as you can get. Not just “dry to touch” but “hard enough that a spike mark and a road case will not leave permanent scars.”
When you plan an immersive show, treat epoxy curing as part of the schedule, not as background noise you can ignore.
If that feels annoying, you are not wrong. It does make planning more complex. But the payoff is a surface that still looks good in the final weekend.
Types of epoxy systems that work well for sets
Not all epoxies are the same. Some are made for thick glossy floors, some for thin coatings, some for casting props. If you just grab “any epoxy” online, you might fight sagging, yellowing, or poor adhesion.
Here is a simple way to think about common epoxy uses in sets:
| Use | Typical Epoxy Type | Good For | Watch Out For |
|---|---|---|---|
| Concrete floors | Floor coating or self leveling epoxy | Immersive walkways, rooms, stages | Surface prep, hot tire pickup in parking areas |
| Wood platforms | Thin coat floor epoxy or primer + topcoat | Temporary stages, risers, ramps | Movement in the wood causing hairline cracks |
| Props and small features | Casting epoxy or tabletop epoxy | Bar tops, “water” pools, glowing panels | Thicker pours overheating if done in one go |
| Graphics under clear coat | Clear floor epoxy | Control rooms, fantasy maps, signage | Trapped bubbles under vinyl or printed film |
Clear vs pigmented systems for storytelling
From a storytelling point of view, the main question is: do you want to see through the epoxy, or do you want it to carry most of the color itself?
- Clear epoxy works well when you have artwork, texture, or objects below. Think “lake” over painted rocks, depth effects, or sci fi circuits. Light can reach the art and bounce back through the clear layer.
- Pigmented epoxy is better when you want a strong, even surface color with some variation from metallics or chips. Good for labs, luxury lobbies, or surreal monochrome rooms.
You can mix these, of course. For example, pour a pigmented base, then add thin clear layers on top with subtle tints to add depth or grime.
Matte, satin, and gloss in immersive spaces
The default image many people have is a high gloss floor. It reflects light sources and looks wet. For some shows, that works. For others, gloss is a problem, especially with stage lights, projections, or cameras picking up hot spots.
Think about finish this way:
- High gloss: Best for water illusions, sci fi labs, luxury, surreal spaces. Risk of glare, showing every speck of dust.
- Satin: Nice middle ground. Some reflection, but softer. Good for moody environments, museums, and most immersive hallways.
- Matte: Less reflection, more forgiving for lighting. Good when you want texture and subtlety, like crypts, basements, or naturalistic worlds.
You often get these sheens from the topcoat rather than the main epoxy body. So you might pour a glossy epoxy layer, then apply a matte or satin urethane topcoat for the final look.
Design ideas: turning epoxy into a storytelling tool
Let us get more practical. How do you take this clear liquid and actually make it serve your story?
Here are some approaches that have worked in real projects or tests.
Simulating water on a Denver concrete floor
Say you have a warehouse space with a rough concrete slab and you need one section to feel like a flooded tunnel. Full water is not possible, obviously. Epoxy can bridge the gap.
Possible sequence:
- Grind or clean the concrete so it is free of dust, oils, and loose paint.
- Prime the surface with a compatible primer to avoid bubbles.
- Paint the “bottom” of the water with dark greens, blues, and murky browns. Add lighter areas where you want “shallow” spots.
- Scatter subtle 3D objects like gravel, small fake bones, or plant textures and glue them down.
- Pour clear epoxy over the area in one or two thin layers, feathering the edges into dry land.
With careful lighting and sound, that patch of floor can suggest real depth. The transparent epoxy keeps the painting underneath safe from boots and rolling cases.
Creating sci fi or tech surfaces for interactive sets
For control rooms or labs, you might want a floor that looks synthetic, not natural. Epoxy works well when mixed with metallic pigments or neon accents.
Ideas:
- Lay down a neutral gray or white base.
- Add lines of bright color where “circuits” or energy paths would be.
- Use metallic epoxy swirls in specific zones to create a slightly unstable, plasma like look.
- Embed small acrylic pieces or LED pucks under clear layers so they glow through.
This can look very sharp in person and on camera, and it stands up better than a painted floor that takes constant touch ups.
Distressed, haunted, or decayed floors
Shiny epoxy might sound wrong for horror or decay, but a satin or matte topcoat can make it feel old and worn without losing the protective layer.
You can:
- Stain or paint the floor with “water damage” patterns.
- Scatter very fine dust or pigment in areas before the epoxy fully levels to catch micro texture.
- Use a tinted topcoat to add a subtle fog or “smoke” layer across everything.
With careful color choices, you get a floor that seems grimy, but you can still mop it between shows.
Working with Denver shops and suppliers
Even if you like to DIY, it helps to talk with people who deal with epoxy in local conditions every week. They know which products behave well in Denver’s temperature swings, which ones resist yellowing near big windows, and which are too fussy for a rushed theater schedule.
Things worth asking a local supplier:
- Which epoxy systems handle Denver’s temperature ranges in non climate controlled spaces.
- What cure times you can really expect on cool nights or hot afternoons.
- Which primers grip best on older concrete with minor moisture issues.
- How to plan for anti slip textures without ruining your look.
If you can, bring photos or sketches of your set. Explain where the audience will walk, where actors will run, where heavy props will sit. You will get better advice that way than just saying “I need epoxy for a floor.”
Preparation: the boring part that saves your show
Most epoxy failures in sets come from poor prep, not from the product itself. This is the part no one really enjoys, but it has the biggest effect on whether your surface looks good two weeks later.
Concrete prep for immersive floors
For existing concrete in Denver spaces, you might see:
- Old paint layers or markings
- Grease near loading docks
- Hairline cracks and small pits
- Moisture rising through the slab, especially in older buildings
At minimum, you want:
- Mechanical cleaning: grinding or shot blasting, not just sweeping.
- Removal of loose paint or crumbly patches.
- Filling of large cracks or holes with a compatible patch material.
- Testing for moisture where you suspect issues.
If that sounds like overkill, think about how it feels when a whole swath of epoxy pops loose under the audience in week two. You either live with it, or you shut down areas to fix it. Neither is great.
Wood platforms and temporary stages
Wood moves. It expands, contracts, and flexes under load. That fights with epoxy, which wants to sit on a stable, inflexible base.
To make wood work better:
- Screw down all panels tightly, especially seams.
- Use a high quality primer that sticks to wood and helps bridge seams.
- Expect hairline cracks at joints over time and decide if you can live with that.
- Think about where cameras point; cracks are often less visible in low light.
For some immersive projects, a small amount of cracking is an acceptable tradeoff for speed and budget. For others, it might be better to keep epoxy only on main audience routes, not on raised platforms.
Surface cleanliness before a pour
Right before you pour, the surface needs to be cleaner than you think.
Check for:
- Sawdust from last minute carpentry
- Hair and lint from costumes or crew clothing
- Loose glitter or pigment from scenic teams
Vacuuming, then tack cloths, then a final visual inspection with raking light can catch a lot. This is tedious, but every missed object shows up forever inside a clear layer.
Color, lighting, and camera: planning for how the floor reads
Epoxy does not exist in isolation. Your lighting designer, costume designer, and sometimes the cinematographer in film projects all have opinions about the floor, even if they do not say it at first.
How colors shift under different lights
A blue green metallic floor might look rich under halogen work lights, then suddenly turn into a strange teal under LED fixtures. Or your deep red “blood river” floor might go almost brown under certain dim levels.
To avoid surprises:
- Create small test boards with your intended epoxy colors.
- Look at them under your actual stage or gallery lighting.
- Move costume swatches across those samples.
You might discover that a slightly different tone reads much better from the audience’s point of view, even if it seems less dramatic up close.
Gloss and reflections on camera
If your immersive set will be filmed, reflections matter a lot. Glossy epoxy can mirror LED strips, camera rigs, and unseen fixtures.
Tricks to manage this:
- Use satin finishes where you do not need a mirror effect.
- Break up large glossy areas with texture, embedded elements, or pattern.
- Talk early with whoever is handling cameras so you are not surprised on shoot day.
Sometimes a slightly less shiny surface actually feels more real to the audience because they see texture rather than just glare.
Safety and comfort for audiences and performers
Epoxy surfaces can be very safe or very slippery, depending on how you finish them. In immersive shows, people are often walking where they are not looking, because they are reading text on the wall or following a performer. You cannot rely on them to step carefully around hazards.
Slip resistance without ruining the look
You have several options to build grip into the surface:
- Mix fine aggregate into a clear topcoat in high traffic zones.
- Add more texture in hidden areas, keep brightest paths a bit smoother.
- Use matte or satin finishes, which often feel less slippery than high gloss.
There is always a balance between safety and visuals. If the show includes running, sharp turns, or wet shoes from outside, err a bit more toward traction.
Transitions between materials
The edge between epoxy and other flooring is where people trip. That might be:
- Epoxy to carpet
- Epoxy to raw concrete
- Epoxy to wood thresholds
Try to feather the edge instead of leaving a sharp lip. Where that is not possible, light those edges or change color so the audience can read the change.
Budgeting and phasing for real productions
Epoxy is not free, and neither is prep or lost time on the stage. Sometimes, the best move is to pick your battles.
Where epoxy gives you the most impact
Places where epoxy tends to give the best return for immersive work:
- Main audience entry paths and first impression rooms
- Central scenes that appear in marketing photos and press
- Interactive areas where guests spend time exploring details
- Floors under heavy props where paint alone would get destroyed
Quiet back corridors, storage edges, or places guests barely notice might not need it at all. A coat of durable floor paint could be enough there.
Staging work to fit rehearsal and tech
On real productions, you rarely get to clear the entire venue for several days. You have to phase work.
Common pattern:
- Prep and prime a section early, when carpentry in that area is done.
- Pour epoxy overnight or on a dark day.
- Keep that zone off limits while it cures, even if it means rerouting rehearsals.
- Move on to the next section while artists work in the finished one.
This staggered approach is annoying to schedule, but it avoids the meltdown of trying to pour everything at once the week before opening.
Frequently asked questions from set designers
Can I do a large epoxy floor with only a small scenic crew?
You can, but you need to be realistic about what “small” means. A two person crew trying to pour and spread a big floor in one go is going to struggle, especially in Denver conditions. If you do not have many hands, consider:
- Breaking the floor into sections with natural visual breaks.
- Using slower cure products, if available.
- Practicing on a smaller area first so you understand how fast it moves.
If the floor is central to the show, I would argue this is not the place to cut help.
Will epoxy crack or yellow during the run?
It can. UV from big windows, movement in the subfloor, or thermal changes can cause issues. Higher quality systems and UV stable topcoats reduce that, but nothing is perfect.
In many shows, small hairline cracks or mild color shift are acceptable, sometimes even positive for the atmosphere. If you are aiming for a pristine, gallery like floor for months, talk with your supplier and maybe consider UV resistant topcoats and careful light control.
Can I remove the epoxy after the show ends?
Removing epoxy from concrete is messy and involves grinding. From wood platforms, you might be able to unscrew panels and replace them, but the epoxy itself is not something you just peel off.
If you are in a rental venue that wants the concrete “back to normal,” you will need to include removal in your budget and talk clearly with the landlord. For long term installations, it is less of an issue.
Is epoxy worth the trouble for small immersive projects?
I think it depends on how much your show relies on the floor as a storytelling surface. If people spend most of their time looking at walls or objects at eye level, high quality scenic paint and a clear sealer might be enough.
If the floor is part of the narrative, like a “cracked ice” lake, a portal, or a sacred pattern that people walk across, epoxy starts to make more sense. It allows you to keep those images intact across the whole run, instead of patching them nightly.
What is one thing I should do before committing to an epoxy design?
Make a sample that is as close as you can get to full scale. Not a tiny coaster, but at least a square foot or two on the same substrate, with the same colors and finish you plan to use.
Set it under your actual lights, walk on it, film it with your show camera. If it still feels right after that, you probably have a solid direction.
What kind of surface do you want your audience to remember under their feet: something they forgot as soon as they left, or something that made them feel they had stepped out of Denver and into another world entirely?
