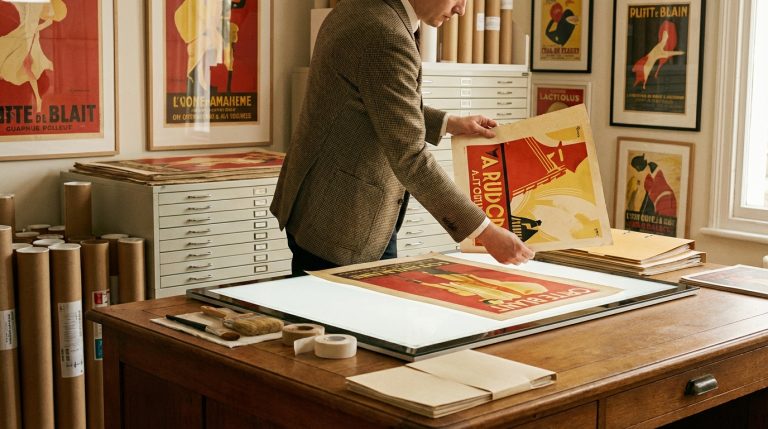
The paper crackles like dry leaves when you lift it. Ink has sunk into rough fibers; the photos have turned the color of weak tea. Margins are frayed where someone thumbed the same corner again and again, waiting for a cue or re-reading a favorite name in the cast list. There is a faint smell of dust and glue and backstage sweat. This is where an entire show now lives: inside a program soft as fabric, inside a photograph losing its contrast grain by grain.
You cannot stop the paper from aging. You can slow its disappearance by capturing it, frame by frame, before light and time finish their work. Archiving is not about nostalgia; it is about giving fragile, analog memories a second stage. Digitizing old photos and theater programs means treating them like sets: lighting them, framing them, building a structure where they can live, be found, and be reused without falling apart in your hands.
Digitizing is not just scanning. It is an act of curation: choosing what to preserve, how it should look, how it should be found, and how it will be used by the next person who wanders into your archive.
You scan so you can design new work from old traces. You photograph so your collaborators in another city can see the original rigging plot notes in the margins. You tag and label so, five years from now, you are not lost in a folder called “misc old stuff” when you urgently need a photo of that one site-specific show under the bridge.
This is how to do it with care, without losing the texture that made those objects worth keeping in the first place.
Preparing your physical archive like a backstage call
Before scanners, file names, or color profiles, there is a simple, quiet task: sorting.
Think of a chaotic tech table an hour before cue-to-cue. Coffee cups everywhere, call sheets mixed with prop lists. No one can work like that for long. Your archive is the same. Every digital choice later will be cleaner if you script the physical process at the beginning.
Spread out your material on a large table. Give each stack room to breathe. Avoid direct sunlight; it fades color prints and makes you work in your own shadow. If you can, work on a neutral surface: gray, unpatterned, something that does not add noise to your view.
Now, look at what you actually have.
- Photographs: prints in envelopes, mounted prints, contact sheets, Polaroids, sometimes glued into scrapbooks.
- Programs: handbills, folded booklets, playbills, festival guides, sometimes with ticket stubs nested inside.
- Extras: posters, postcards, cue sheets, press clippings, sketches taped to the back of a program.
At this stage, you are not scanning. You are cataloguing by eye. Stack by stack, ask:
Is this material historically meaningful to my practice or community, or is it just clutter I was afraid to throw away?
This question matters. Digitizing everything you have ever touched turns your hard drive into another overstuffed prop cage, where nothing can be found when needed. Respect your future time. Keep:
– Work that marks a shift in your style or career.
– Shows that mattered to a company, a scene, or a community.
– Early experiments that you might mine later for ideas.
– Items connected to people who shaped your practice.
Let go of six nearly identical backstage snapshots where no one remembers who is in them. You can still keep them physically in a box for sentimental reasons, but do not force your digital archive to carry everything.
Gentle handling: treating paper like a performer
Old photos and programs behave like actors with different needs.
Glossy 90s prints curve upwards, refusing to lie flat. Newsprint programs from student shows crumble if you pinch them too hard. Stiff cardboard posters resist any attempt to bend them onto a scanner bed.
Keep your hands clean. Wash them; avoid greasy lotion. Cotton gloves are excellent if you own them and if they do not make you clumsy. If they do, clean bare hands are better than dropping something.
If you meet:
– Torn edges, do not “fix” them with tape. Tape ages badly and can stain or tear further. Let the scanner or camera capture the tear honestly.
– Curled photos, press them under a heavy book for a day or two between sheets of plain paper. This taming step will give you sharper, easier scans.
– Stuck pages (old glue or moisture), do not force them apart. Photograph that spread as-is. A damaged artifact is still an artifact.
The aim is not to restore these objects to some imaginary perfection. It is to record their current, honest state in high enough detail that the story they carry is not lost.
Choosing your method: scanner, camera, or phone
Your tools will shape the look of your digital archive. The same way lighting design changes how a set feels, your capture device changes how your history will be read.
| Method | Best for | Strengths | Limitations |
|---|---|---|---|
| Flatbed scanner | Photos, flat programs, delicate paper | Even lighting, consistent color, high detail | Slow, size-limited, not ideal for bound items |
| Camera + copy stand | Large posters, bound programs, textured items | Flexible, fast, works for oversize pieces | Needs careful lighting, more setup |
| Smartphone scanning apps | Quick capture, reference images | Portable, easy sharing, auto correction | Less control, more compression, variable quality |
If you care about quality and you are not under major time pressure, a flatbed scanner and a basic camera setup will carry you a long way. A phone is a good assistant, not the director.
Using a flatbed scanner with intention
A scanner is a very obedient collaborator. It will do exactly what you ask, so you need to give it clear instructions.
For most photos and programs:
– Resolution: 600 dpi is a good baseline. It captures enough detail for reprints and zooming in on small text.
– Higher resolution: Use 1200 dpi if you have tiny text, very small photos, or if you plan to crop heavily. Be aware that file sizes will grow sharply.
– Color mode: Scan in 24-bit color, even if the item is black and white. Paper has tone; old photos carry faint color casts that say something about their time.
– File format: Save master files as TIFF if possible. TIFF is large but stable and less prone to visible compression artifacts. For everyday sharing, export JPEG copies from these masters.
Think of TIFF files as your negative. You do not casually throw them away. You work from them, duplicate them, and keep them safe.
Clean the glass carefully with a soft, lint-free cloth before you start. Any dust will repeat on every image and be very tedious to remove later.
Place the photo or program carefully, aligning it with a corner of the scanner bed. Close the lid gently; do not press down hard on fragile bindings or thick stacks.
Preview first. Crop within the scanner software so you do not capture large swaths of empty background around a tiny object. Check:
– Are the edges straight?
– Is the entire page included?
– Is anything cut off at the spine?
Scanning bound programs is always tricky. For fragile bindings, avoid forcing them flat; this can crack the spine. You can:
– Scan each page as far as it will naturally open.
– Accept a small shadow near the spine rather than damaging the book.
– For very important programs, consider camera capture instead.
Camera capture: building a tiny photo set for your archive
For large posters, thick scrapbooks, or objects that simply will not behave on a scanner, treat the process like a tabletop shoot.
You need:
– A camera with manual or semi-manual control (DSLR, mirrorless, or a good compact).
– A solid tripod or copy stand to keep the camera steady and parallel to the page.
– Two lamps or soft light sources on either side.
Set your camera directly above the item, lens facing straight down. The lens plane should be as parallel as possible to the surface. Any tilt will distort straight lines.
Lighting is where your set designer brain wakes up. Hard light at an angle will create deep shadows in folds and exaggerate texture. For archival capture, you want soft, even light:
– Use two identical lamps, one on each side, at equal distance and height, pointing toward the center of your subject.
– Bounce light off white walls or foam boards rather than pointed straight at the page. This softens harsh reflections on glossy photos.
– Avoid mixed color temperatures. Do not mix daylight from a window with warm tungsten lamps. Choose one type of light.
Set your camera:
– Aperture (f-stop): Aim for f/5.6 to f/8 for sharpness across the page.
– ISO: Keep it low (100-400) to avoid noise.
– Shutter speed: Adjust to match exposure; a tripod lets you use slower speeds without blur.
– White balance: Manually set it to match your light (daylight, tungsten, or a custom white point using a gray card).
Take a test shot. Zoom in on text and halftone images. Check for blur, color casts, and reflections. Adjust before you commit to an entire stack.
Using a phone with discipline
A modern phone camera, used carefully, can capture decent archival images, especially for reference.
Choose a scanning app that:
– Lets you save full-resolution images.
– Does not aggressively add filters.
– Allows export to high-quality JPEG or PDF.
Set yourself some rules:
– Always wipe the lens before a session.
– Work in good, even light; avoid overhead spotlights that create glare.
– Do not rely on auto “straighten” or “clean up” functions as your only copy. They sometimes over-sharpen or crush delicate tonal detail.
If the material is irreplaceable or very important for future print use, use a scanner or camera instead of only the phone.
Color, contrast, and keeping the mood honest
You are not restoring a painting for a museum, but you are dealing with color choices that carry meaning. The yellowing of old newsprint tells the viewer about age. The offset printing of a 70s festival program has a particular soft grain. Over-cleaning can erase this context.
Your goal is not to make old material look “new”, but to make it legible and faithful, the way a lighting designer reveals the actor without flattening their face.
Use a simple photo editor or scanning software that gives you access to:
– Brightness
– Contrast
– Color balance
– Sharpness
Work on copies, not your master TIFFs.
For photos:
– Adjust overall brightness so faces and key details are visible.
– Resist the urge to crank up contrast too high; it can destroy shadow detail.
– Correct obvious color casts if they are a result of scanning, not age. If the paper itself is slightly warm, that warmth belongs.
For programs:
– Increase contrast slightly so small text reads clearly on screen.
– Brighten gently, paying attention to whether the paper texture starts to vanish.
– If the paper is severely discolored, you can neutralize it a bit, but keep some tone; bone-white backgrounds can look artificial.
Sharpening is a subtle tool. Use it only enough to define text edges, never so much that it produces halos around letters or grainy textures.
If you work on a color-calibrated monitor, your adjustments will be more reliable. If not, at least avoid making big decisions on a very bright laptop screen in a dark room; everything will look misleadingly vivid.
Naming files so your future self can breathe
The momentum of scanning can trick you into accepting whatever default filename your device offers. “Scan001.tif” feels harmless when you are tired. Six months later, “Scan001” is indistinguishable from “Scan278” without opening each file.
File naming is stage management for your archive.
A good naming scheme is more valuable than any fancy storage device. It turns a pile of pixels into something searchable, shareable, and usable.
Design a simple pattern and stick to it. For example:
“YEAR_SHOWNAME_ITEMTYPE_DESCRIPTION_VERSION”
Examples:
– 2012_Macbeth_Warehouse_Photo_CastBow_01.tif
– 2015_LightCityFestival_Program_FrontCover_01.tif
– 2008_StudentShow_Basement_Program_Page02CastList_01.tif
Guidelines:
– Use only letters, numbers, underscores. Avoid spaces and special characters that can misbehave on different systems.
– Pad numbers with zeros if you have many similar files: “Page001”, “Page010”, “Page100”.
– Put the date or year at the start, so files sort chronologically.
You can refine patterns for your own practice. The crucial part is consistency.
Folder structure: shelves for your invisible library
Your files need a home layout that makes sense whether you remember the exact title of something or only a vague detail like “the show with the red umbrellas under the bridge”.
Two helpful hierarchies:
By project:
– /Archive/Shows/2012_Macbeth_Warehouse/Photos
– /Archive/Shows/2012_Macbeth_Warehouse/Programs
– /Archive/Shows/2012_Macbeth_Warehouse/Press
By type:
– /Archive/Photos/ByYear/2012
– /Archive/Programs/ByCompany/LocalTheatreCo
– /Archive/Posters/Festivals
You can have both, if you use shortcuts or run indexing software later. Start with what makes immediate sense when you are tired at midnight.
Avoid one massive folder that holds everything. That is like building a beautiful archive and then pouring all boxes into a single pit.
Metadata: writing the story behind the pixels
A photo without context is like a set without blocking. It looks interesting, but no one knows what happened there.
Metadata is simply “information about the file”. You do not need a fancy database to start. Even a small text note gives future-you a way back in.
Minimum metadata: what, where, when, who. Extra credit: why it mattered.
Options:
1. A simple spreadsheet
Create a spreadsheet with columns such as:
– File name
– Show or event title
– Venue
– City
– Date (at least year and month)
– People (cast, director, designer, photographer)
– Notes (special context: first site-specific show, collaboration with X group, etc.)
2. Embedded metadata
Many photo tools let you add keywords, captions, and descriptions directly into the file’s metadata fields (IPTC, XMP). This is useful if you plan to search through archive software later.
For programs, record:
– Full show title
– Company name
– Venue name
– Dates of the run
– Director, writer, designers
– Any special dedications or unusual structure (for future reference)
For photos, record:
– Photographer (credit matters)
– Subject (rehearsal, performance, backstage, set construction)
– Names if identifiable
– License or usage rights, if relevant
You do not have to annotate everything at once. You can schedule short metadata sessions, treating them like gentle revisits to past work.
Dealing with odd formats and tricky objects
Not every artifact fits neatly into “photo” or “program”.
Posters and oversize prints
If the item is larger than your scanner bed, you have two main paths: camera capture or stitching.
Camera capture you already know. For stitching:
– Scan the poster in overlapping sections, making sure each scan overlaps the previous by at least 20 percent.
– Use software that can merge images into a single composite, much like panoramic stitching.
– Align edges carefully and check for visible seams.
This can be time consuming but yields very high-resolution files, which are useful for reprinting or detail work.
Scrapbooks and collages
Some theater histories live in chaotic scrapbooks: ticket stubs next to reviews, programs half-covered by taped photos.
You have a choice here.
Option A: Capture each page as a single “document”, like photographing a curated wall. You preserve the original arrangement and relationships.
Option B: Isolate individual items if they are important enough to deserve their own file: a rare program, a brilliant photo.
Often a mix works:
– Full-page scans for context and collage.
– Selected close-ups of key items.
Never pull something off a page unless the scrapbook is your own and you are certain you do not care about its physical arrangement.
Translucent paper and vellum
Old lighting plots, some programs, or inserts can be printed on thin, translucent paper.
For scanners:
– Place a piece of black paper behind the translucent sheet. This gives contrast and stops text on the back from bleeding into the front.
– Scan in color; the subtle tone differences help legibility.
For cameras:
– Avoid backlighting, which will make the sheet glow and flatten the ink.
– Again, use a dark, matte backing board.
Preserving the physical objects after digitization
Digitizing does not mean the physical items lose their value. For some, the weight of the paper, the way ink smells when you fan the pages, is part of the history.
After scanning, give the originals a kinder storage life than they likely had before.
Treat programs and photos like small-scale sets: protected from direct light, supported so they do not warp, and stored so they can be reassembled without confusion.
Basic guidelines:
– Store in acid-free folders or envelopes. Regular office folders can accelerate yellowing.
– Use archival photo sleeves for prints. Avoid PVC; look for polypropylene or polyester.
– Keep items flat where possible. Very large posters can be rolled around a tube (not folded) and stored in a protective sleeve.
– Label boxes and folders clearly with show names and years.
Aim for a cool, dry environment away from radiators, damp walls, and direct sun. Attics and basements are often problematic: heat, moisture, or both.
Backing up your digital archive: redundancy as design
There is nothing more dispiriting than spending weeks scanning only to lose everything to a failed drive. Redundancy is less glamorous than creative work, but it has the same role as safety cables on a heavy rig.
At minimum, plan for what many archivists call a “3-2-1” style pattern, without needing to quote it:
– Keep at least three copies of your archive.
– Store them on two different kinds of media.
– Keep one of those copies off-site or in a different physical location.
Example:
– Primary copy on your main computer or a dedicated external hard drive.
– Secondary copy on another external drive that you update regularly and store in a different place (studio, trusted friend, a safe).
– Tertiary copy in a reputable cloud storage service.
Automate where you can. Backup software that runs quietly in the background will serve you better than a plan that relies on your memory.
Your archive is part of your practice. Protecting it is not separate from making work; it is the long shadow of every show you build.
Test your backups occasionally. Try restoring a random folder from an external drive or cloud. Confirm that file names, structure, and metadata remain intact.
Making the archive usable: access, sharing, and creative reuse
A secret archive no one can navigate is almost as frustrating as no archive at all. Design for access the way you design a lobby experience: clear paths, intuitive signs, and a feeling that people are welcome to wander.
Local catalogs and photo tools
If you prefer files stored locally, consider:
– Image management software to browse, tag, and filter photos and scanned pages.
– Simple catalog tools that let you flag favorites, sort by date, and add keywords.
Align your digital categories with the mental ones you already use in conversation: “early warehouse phase”, “festival era”, “site-specific river work”.
Shared archives for a company or collective
If your work is collaborative, shared archives can deepen the memory of a group.
Options include:
– Shared cloud folders with clear naming and guidelines.
– A simple website or private gallery where selected items are visible and searchable.
– Periodic “archive afternoons” where the group helps tag, describe, and contextualize images.
Set basic rules early:
– Credit photographers and designers.
– Agree on where and how archival images can be used in new materials.
– Respect sensitive content; some backstage material might not be suitable for public release.
From archive to creative source
Digitized material can feed new work in unexpected ways:
– Project old photos as textures on new sets.
– Print enlarged details of programs as graphic elements in an exhibition.
– Use handwriting from old cue sheets as typography on a poster.
– Build timelines of your practice, mapped visually with images and ephemera.
This is where the archive stops feeling like homework and starts to feel like a studio full of raw material.
Knowing when “good enough” really is enough
Perfectionism can quietly sabotage archival work. You start by wanting ideal scans, then color calibrations, then exact bibliographic records, then complex database structures. Before long, you are designing a system too heavy to sustain, and you stop entirely.
You do not need a scholar’s archive unless you are actually working in that context. You need a practical, honest record of your work and its surrounding culture.
Good enough is: legible scans, consistent file names, enough information to find what you need later, and safe backups. Anything more is a luxury, not a requirement.
If you catch yourself stalling over small technical upgrades instead of actually scanning, simplify:
– Commit to 300-600 dpi for most items.
– Pick one folder structure and live with its imperfections.
– Reserve deep metadata only for your most important shows or projects.
Your future self will be much more grateful for 80 percent of your history captured at reasonable quality than for 5 percent captured perfectly.
When to call in a professional
There are cases where it is wise to admit that an object is beyond your setup:
– Very fragile items: cracked, flaking photos; programs afflicted by mold.
– Unique, historically significant material related to well-known productions or venues.
– Formats you cannot physically read, such as negatives, slides, or ancient data disks.
Conservation specialists and professional archival services can:
– Stabilize damaged items before digitizing.
– Use specialized scanners for film and delicate paper.
– Advise on long-term physical storage.
This costs money, so it makes sense to reserve for your most irreplaceable pieces.
Archiving as part of the creative cycle
There is a gentle rhythm available here if you choose it. Each project can contain its own moment of closure:
– After strike, gather photos, programs, sketches, cue sheets.
– Sort quickly while the show is still vivid.
– Digitize the key materials before they vanish into random drawers.
– Add names, dates, and anecdotes while you still remember them.
Treat this as part of the production process, not an optional chore. It is like sweeping the stage and resetting for the next rehearsal: it respects the work that just happened and clears space for what comes next.
The archive you build is not static. It is a living backstage, full of stored light, old lines, forgotten experiments. By digitizing with care, you are hanging your past on well-marked rails, ready to be flown back in whenever you need it: for reference, for teaching, for mourning, for joy, for building the next impossible set.
